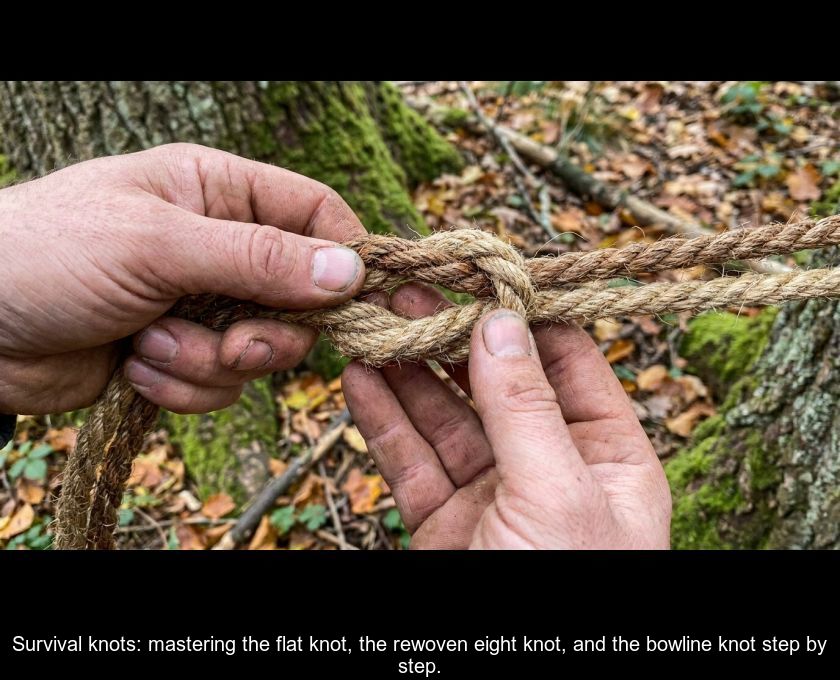
Survival Knots: Mastering The Flat Knot, The Rewoven Eight Knot, And The Bowline Knot Step By Step.
A rope is only as valuable as the knot that finishes it. Here, hand by hand and strand by strand, are the few knots that are enough to set up a shelter, anchor a line, extend a rope that is too short... and get out of a tight spot.
Why knots are vital for survival in the wild
A rope, in the great outdoors, is the most versatile tool you can have in your pack. It is used to assemble the poles of a shelter, to rappel down a wall, to tension a line, to set traps and nets, and even, when frayed, to make a candle wick. But a rope without a knot is useless: it’s the knot that transforms a piece of cordage into a reliable fastening.
There is a knot for every task, and the right reflex is to know which one to choose. Learn a few, but learn them well: well enough to tie them in the dark, with cold fingers, in the rain. And above all, learn to untie them, because there is nothing worse than a knot that slips... except a knot that is impossible to untie at the crucial moment.
Nota Bene: in all the explanations that follow, we refer to the "working end" as the end of the rope you are working with, and "standing part" as the rest of the rope, the part that remains stationary. Also remember that a knot costs strength: a knotted rope retains only about half the strength of a continuous rope. Hence this simple rule, never cut a rope unless absolutely necessary; you don’t know how long you will need it tomorrow.
If you are working with improvised cordage (nettle fibers, willow bark, surface roots, vines), test it first: tie two lengths together with a simple knot and pull firmly on it. If it snaps cleanly, the fiber is too brittle. If it slips, it is too smooth. A good fiber "bites" and holds.
The flat knot (reef knot): the essential basic knot to know.
The flat knot, also known as the square knot, is probably the most well-known of all. Its role: to join two ropes of the same thickness. It holds under tension and yet can be easily untied when the pull ceases, which explains its popularity.
Its limitations must be understood before entrusting it with anything important. It is not reliable between two ropes of different diameters, and it should not be used with nylon, where it eventually slips. So, be cautious with smooth modern materials.
On the other hand, it provides enormous benefits elsewhere: it is very useful in first aid because it lies flat against the body of the injured person and does not create a hard spot under a bandage. It is also used to secure a coil of rope or a skein carried over the shoulder, and to assemble sheets, blankets, or curtains when a makeshift rope is needed.
Detailed steps to tie a reef knot without error.
Take one strand in each hand and proceed in this order, without improvising:
- Pass the strand from the right over the one on the left, then bring it under.
- Now take the strand that is on the left, pass it over the one on the right, then under.
- Check before tightening: the two loops formed should be able to slide over each other, and the knot should lie flat and symmetrical.
Tightening is as important as braiding. Pull on both strands on each side at the same time, or just on the two current strands, but make sure the knot actually closes and doesn't remain loose. A half-tight flat knot works, deforms, and eventually comes undone by itself.
The mantra to repeat quietly: right over left, then left over right. It's the alternation that makes all the difference. Do it twenty times in a row with two laces, it will stick in ten minutes and won't come undone.
The cow knot trap: avoiding fatal confusion
If you cross two times in the same direction (right over left, then again right over left), you do not get a flat knot but a cow hitch. It looks very much like the first one, except that it does not fulfill any of its promises: it may not hold under load and, if it has been heavily stressed, it becomes very difficult to undo. The worst of both worlds.
How to spot it? Look at the knot laid flat, without tension. A correct flat knot is regular, the two loops fit together neatly and slide over each other when you manipulate them. The cow hitch, on the other hand, appears twisted, with the strands coming out at an angle from the knot instead of coming out parallel.
The reaction is simple and without discussion: you undo everything and redo it. On a rope that must hold a load, a shelter in strong winds, or an improvised stretcher, this two-second check is well worth the time it takes.
Secure your flat knot with half-hitch reinforcements.
To sleep peacefully, we don't just stop at the flat knot: we lock it. With each of the two working ends, make a half-hitch on either side of the knot. Specifically, you wrap the working end around the neighboring standing part and then pass it back through the loop you just created, tightening it against the body of the knot.
Nota Bene: the half-hitch is the building block of dozens of knots. One turn around an object or a strand, the end passed back through the formed loop, and there you go. Alone, it doesn't hold much. Doubled or added to another knot, it secures everything.
This little addition changes a lot on wet, frozen, or slightly slippery ropes, where the flat knot alone would tend to slip. It does make the knot slightly longer to undo, it's true, but you retain the option to first open the half-hitches and then untie the flat knot normally.
The re-tied figure-eight knot: anchoring a rope to an inaccessible point.
Let's start with the simple eight, as it is essential to know it for understanding the rest. Make a loop, then pass the working end first behind the standing part, then around it, and bring it back to the front through the loop. You get an excellent stopper knot at the end of the rope, much more effective than a simple knot, especially for preventing a rope from slipping through a ring or between your fingers.
Use the same motion with the doubled rope, using the loop as the working end: you get a looped eight, much safer than a loop made with a simple knot, which can be placed over a piton or a spike to secure a rope.
The rewoven eight addresses a very concrete problem: you need to secure your rope to a tree, a post, or a rock whose top is out of reach, making it impossible to thread a loop from above. The solution: create a loose eight on the rope, at a good distance from the end. Wrap the working end around the anchor, then reintroduce it into the eight by following exactly the same path, parallel to the first passage, until it comes out on the other side. Then gently tighten, evening out the two paths.
Two complementary knots deserve mention here. The clove hitch, very effective when the pull is applied perpendicularly to the bar or pole: pass the working end over and around the bar, bring it back crossing over itself, make a second turn around the bar, then slide the end under itself going in the opposite direction of the standing part, and tighten. Be careful, it can loosen if the tension comes at an angle or in jolts. For a stake or post subjected to forces from all directions, prefer the dead turn and two half-hitches: two complete turns behind the post, then the working end passed over and under the standing part, in the loop thus formed, and a second identical half-hitch to lock it.
The sheet bend knot for joining two different ropes.
Here is the knot that saves the day when your two ropes are neither the same thickness nor the same material. The listening knot joins both identical ropes and very dissimilar ones, and it often proves to be more effective than the flat knot, even with equal diameters. It is the preferred choice for wet or frozen ropes, or for joining two different materials (such as a leather strap and a plant cord).
The execution is quick. Form a loop with the first rope and hold it closed in one hand. Take the working end of the second rope, insert it into the loop, pass it behind the entire loop to come back to the front, then slide it under itself and bring it up through the loop. Pull to tighten, and let the knot take its final shape as the tension increases.
Its advantages in a survival situation are valuable: it consumes very little rope length, it unties quickly as long as it hasn't been subjected to strong tension, and if executed well, it never slips... provided that the force is steady. If the tension is erratic, in bursts, switch to the reinforced version.
The double listening knot for a reinforced junction.
The double bowline is the armored version of the previous one. Use it when the ropes are wet, when their diameters are very different, or when the load pulls in jerks, situations where a simple bowline may start to slip.
Form the loop in the thicker rope. Pass the working end of the thinner rope through this loop, bring it under the thick working end, then exit forward along the outside of the loop and go all the way around. Bring this thin end between itself and the outside of the thick loop. Repeat: a second complete turn around the loop, and the thin end exits at the same place, on the outside of the thick loop.
Then tighten firmly, guiding the knot so that the turns sit neatly side by side, without overlapping. One point of caution: these two bowlines, simple or double, will loosen if not properly tightened, and they are not suitable for very smooth materials like nylon fishing line.
Improvised blocking knots to secure a hook or a tool.
Making a makeshift hook (a thorn, a sharpened bone, a bent nail) requires a knot that locks onto itself. Two variations cover all cases:
- Hook with an eye: pass the line through the eye, make two turns around the shank, then bring the working end back through these two turns. Gradually tighten, and test the strength by pulling on it before going fishing.
- Hook without an eye: form a loop around the bottom of the shank. Make two half-hitches descending from the top of the shank, then pass the working end through the lower loop. All that's left is to pull on the standing part to lock everything in place.
The same logic applies to a tool. Whipping, which involves tightly binding one end of a rope with twine to prevent it from fraying, is also used to wrap a handle of an axe or machete, and even to reconstruct a knife handle if a thicker cord is used. The principle: lay a piece of twine along the rope, leaving a length for your hand to hold. Wrap the twine tightly over this laid strand, then form a loop with the free end, fold it over the already bound part, continue wrapping over the loop, and finally pass the wrapping strand through this loop before pulling on the short end. Cut off any excess neatly.
A binding is only effective if it is tight and even. If it's too loose, it slips and falls off. If it's too thick, it doesn't close properly; if it's too thin, it slips. It's a gesture to practice on a piece of rope before you need it.
Breaking free from improvised restraints: reflexes and escape techniques
Knowing how to tie is also knowing how to untie a knot made by someone else. Being restrained, even briefly, is very painful and can cause real injuries by cutting off blood circulation. Therefore, the first work is done while you are being tied up, not after.
The reflexes to have are discreet and effective:
- If you are tied to a chair, relax and slouch, keeping the curve of your back away from the backrest. By straightening up afterward, you will regain some slack.
- Inflate your chest and keep it inflated until the end of the binding.
- Keep your knees and ankles slightly apart, as well as your hands, just enough to be able to free yourself, without exaggerating lest they tighten.
Then comes the patient work. If you are on the ground with your hands tied behind your back, try to bring your hands under your buttocks to get them in front: from the front, you can attack the knots with your teeth. Look for any sharp edge, a shard of stone, metal, or a piece of furniture to wear down the rope by friction. If you are gagged, try to hold the gag between your teeth so it doesn’t sink all the way to the back of your mouth, and a blindfold can be pushed up by rubbing against a shoulder or ledge, never down where the nose blocks everything.
Finally, if you are with others, work collectively: untying a neighbor's bonds with your fingers or teeth is much easier than dealing with your own. And keep a cool head; an escape plan should only be attempted if the chances of success are truly high.
To remember: four knots, and practice.
Let's summarize what matters. The flat knot for joining two ropes of the same thickness, right over left then left over right, checking the sliding loops, and two half-hitches for reinforcement if the stakes are high. The cow hitch, its dangerous lookalike, identifiable by its twisted appearance and easily redone without hesitation.
The figure eight as a stopper knot, and its rethreaded version to anchor a rope to a support with an inaccessible top. The clove hitch for perpendicular pulling, the round turn and two half-hitches when forces come from all directions. And the sheet bend, simple or double, to join two ropes that had nothing in common.
The rest is a matter of hands. Take two pieces of cord, keep them in your pocket, and practice these knots in the evening in front of the television, then with your eyes closed. The day you need to stretch a tarp in the rain or join two short pieces of rope, you won't think anymore: you'll just do it.