First Aid In Remote Areas: Treating Injuries Without A Doctor
No doctor around for miles, a serious injury on your hands, and no desire to lose your cool? Here are the actions that really make a difference when no one can come to your aid in time.
Why medical protocols change in the absence of professional assistance.
When you venture far from everything, whether on a trek, an expedition, or simply due to an accident in the wilderness, the situation changes completely. Classic first aid gestures are designed to stabilize an injured person while waiting for the arrival of firefighters or emergency medical services. But if no one can come for several hours or even days, sometimes you need to go beyond mere survival.
This doesn’t mean improvising recklessly. There is a very specific order of priority when dealing with a serious injury, especially if there are multiple victims at the same time: first, restore breathing and heartbeat; then stop any bleeding; next, protect wounds and burns; immobilize fractures; and finally, treat shock.
Before even attending to the victim, one reflex must become automatic: ensure that you are not putting yourself at risk. Electrical cables, gas leaks, structures threatening to collapse... a rescuer who injures themselves does no one any good. Some of the actions presented here are deliberately radical; they are only justified when life is at stake and no external help is likely to arrive in time.
Remove the victim from immediate danger before any care.
Before applying any bandages, it is essential to eliminate the danger still threatening the victim; otherwise, all care will be useless. In the case of a vehicle on fire or a burning building, the person should be moved to safety. On a road, traffic should first be stopped before approaching.
In the event of electrocution, the top priority is to cut off the power. If this is impossible, one should stand on a dry, non-conductive surface (wood, plastic) and push or leverage the victim with a dry stick, never with bare hands until it is certain that the contact has been broken. In the presence of gas or toxic fumes, the source should be turned off if possible, and the victim should be immediately transported to open air.
Moving a person whose injuries are unknown always carries a risk, especially in the case of spinal trauma where even the slightest uncontrolled movement can sever the spinal cord. However, if the danger persists, there is no alternative; the victim must be moved, ideally by several people, while keeping the head and body perfectly aligned.
Assess the breathing and consciousness of the injured person.
In the face of an unconscious person, the first reflex is to check if they are breathing. If not, artificial respiration should begin immediately. If they are breathing but remain unconscious, the mouth should be inspected to rule out any obstruction, visible bleeding should be treated, and then the person should be placed in the recovery position.
To perform this placement, grasp the clothing at the hip to gently roll the victim onto their side. The arm and leg on the side they are being turned towards are moved outward, with the elbow and knee bent, and the head turned in the same direction. The other arm is placed along the body and the other leg remains slightly bent.
This stable position prevents vomit or fluids rising from the stomach from blocking the airways and keeps the tongue from falling back into the throat. Then, simply pull the jaw slightly forward to ensure that the tongue does not obstruct the airflow, and loosen any tight clothing.
Warning: if a spinal injury is suspected, this position is prohibited. In that case, the airways must be kept open in another way, using an airway if one is available, and mouth-to-mouth resuscitation should be performed in this position if necessary.
Practice artificial respiration in an emergency situation.
Mouth-to-mouth remains the fastest and most effective method to restart breathing. The victim's head is tilted back while keeping the jaw open to prevent the tongue from blocking the airway. The nostrils are pinched, the mouth is checked for any obstruction, and then one places their mouth over the victim's to blow air.
It is important to monitor that the chest rises with each breath. If it does not move, the victim should be turned on their side and struck between the shoulder blades to dislodge any potential obstruction before resuming. Initially, six quick breaths are given, then the pace slows to twelve per minute until spontaneous breathing returns.
For a child, breaths should be much gentler, in small puffs for an infant, as a forceful breath can damage still fragile lungs. If the victim's mouth is inaccessible, air can be blown through the nose while keeping the mouth closed.
Two other techniques exist when mouth-to-mouth is impossible. The Silvester method (patient on their back, shoulders elevated, pressing on the ribs, then lifting the arms) is suitable in cases of facial injury or poisoning. The Holger Nielsen method applies to a victim who must remain face down, typically a drowning victim, alternating pressure on the shoulder blades and pulling the arms backward at a rate of twelve cycles per minute.
Never give up too quickly: victims of drowning, hypothermia, or electrocution have been revived after more than three hours of resuscitation without spontaneous breathing.
Check the injured person's heart activity and pulse.
The pulse is taken at the wrist, just above the crease, on the thumb side, or in the neck, in the hollow next to the Adam's apple. In a relaxed adult, the normal rhythm is around 60 to 80 beats per minute (72 on average). In young children, it naturally rises between 90 and 140.
To save time, count the beats for 30 seconds and multiply by two, stopwatch in hand.
If no pulse is detectable and the pupils are abnormally dilated, immediate cardiopulmonary resuscitation (CPR) should be started alongside artificial respiration. After 10 to 12 breaths without improvement, proceed to chest compressions: the victim should be lying on a hard surface, place the heel of one hand on the lower half of the sternum, the other hand on top, arms straight, and press down about 4 cm in adults.
When alone, alternate 15 compressions followed by 2 breaths. With two rescuers, the rhythm changes to 5 compressions followed by 1 breath, with the person giving breaths monitoring the pulse in the neck and the pupils simultaneously. For infants, two fingers are sufficient at a rate of 100 per minute. For children up to ten years old, use the heel of one hand at a rate of 80 to 90 per minute.
Manage choking and airway obstructions.
If the victim is coughing and still able to breathe, let them do so; their cough is more effective than any maneuver. Only when they can no longer speak or breathe should you intervene with the Heimlich maneuver.
Position yourself behind the victim, arms around their waist, a clenched fist placed between the navel and the lower ribs, with the other hand on top. Pull sharply upward and toward you four times in a row. If that doesn't work, give four firm blows between the shoulder blades, then resume abdominal thrusts, alternating until the obstruction is cleared.
If you are alone in a choking situation, you can replicate the pressure of the Heimlich maneuver by throwing your abdomen against the back of a chair, a barrier, or a tree trunk. For an infant, place them face down on your forearm, head lower than the torso, and give four taps between the shoulder blades with the heel of your hand, then turn them over to press four times with two fingers at the center of the chest. For a small child, you can hold them upside down to tap their back; for an older child, lean them over your knee. For a pregnant woman or an obese person, the thrusts should be applied to the middle of the sternum rather than the abdomen.
In extreme cases where nothing works and the victim will die from choking without intervention, there is a last-resort gesture: a small incision made in the hollow between the Adam's apple and the small cartilage bump just below it, to insert a hollow tube (an emptied pen, clean pipe) that allows air to pass directly into the trachea. This is a risky maneuver, reserved for situations where the victim would die anyway without it.
Nota Bene: this technique, called cricothyrotomy, should only be considered as a last vital resort when the Heimlich maneuver has failed multiple times and no help is possible. It carries real risks for an untrained person.
Mastering a dangerous hemorrhage without medical equipment.
The human body contains about 6.25 liters of blood. Losing half a liter results in mere discomfort, losing a liter causes real dizziness with an increased pulse, a liter and a half leads to collapse, and beyond two liters, death becomes possible. It goes without saying that there is not a second to lose in the face of significant hemorrhage.
The first thing to do is to apply direct and firm pressure on the wound with any clean cloth (handkerchief, shirt), maintained relentlessly for 5 to 10 minutes. Resist the temptation to lift the dressing to check; if blood seeps through, add another layer on top without removing the previous one. For a limb, elevate the injured part above the level of the heart while maintaining pressure.
For arterial bleeding, blood spurts in jets in rhythm with the pulse; you can compress the artery against the bone at specific pressure points: above the ear for the skull, on the side of the jaw for the face, above the collarbone for the shoulder, at the elbow crease for the forearm, in the groin for the thigh, at the knee for the leg, and on the front of the ankle for the foot.
A tourniquet should only be used as a last resort and only in two places on the body: at the top of the arm or at the top of the thigh, never elsewhere. Wrap the limb three times with a band at least 5 cm wide, tie a half-knot, place a stick on top, and twist it until the bleeding stops. Note the time of application, write TK and the time on the victim's forehead if you need to leave, and above all, never cover it and do not leave it in place too long, or you risk losing the limb.
Bandaging techniques: utilizing the body's natural contours.
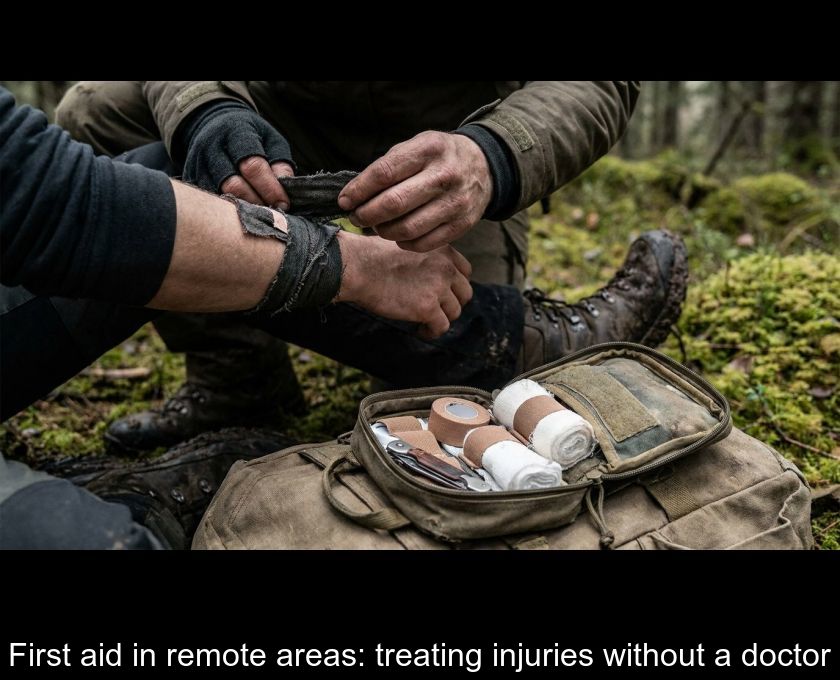
A triangular bandage, at least one meter on each side, is the most versatile tool there is: when folded, it serves as a sling; when unfolded, it covers large areas. To bandage, you always start with a firm diagonal turn to anchor the bandage, then each subsequent turn covers two-thirds of the previous one, with parallel edges.
The hand is bandaged starting from the wrist, going over the back of the hand, around the fingers just below the nails, and then into the palm. The foot follows the same logic starting from the ankle. For the forearm or leg, you always start from the lowest point and work your way up. Around an elbow or knee, you make one turn around the joint and then alternate above and below.
The trick that few people know: to slide a bandage under an injured person without moving them, you use the body's natural hollows—the nape of the neck, the waist, the groin, and the back of the knees. This allows you to pass the bandage underneath without having to lift the victim.
Always finish the knot on the uninjured side, with a flat knot that is easy to undo, and regularly check that circulation is not cut off. Bluish or cold fingers or toes signal a bandage that is too tight and needs to be loosened immediately.
Clean and disinfect an open wound without assistance.
Any open wound is a risk of infection, so it must be cleaned methodically. Cut the clothing around the area, clean the surroundings, and then irrigate the wound to remove all dirt. The essential action to remember: always clean from the center outward, never the reverse, otherwise you reintroduce dirt into the wound.
Soap is an excellent antiseptic, to be used both for washing hands before touching the wound and for cleaning the wound itself, preferably with boiled water. In the absence of clean water, urine can be a temporary solution: it is a sterile liquid that does not cause infection, and its uric acid even has a slight cleansing effect.
If a wound becomes infected despite everything, a warm saline bath or a poultice can help draw out pus and reduce swelling. Almost anything that can be crushed will do: rice, potato, roots, bark, or even clay. Boil it, wrap it in cloth, and apply it as hot as tolerable, without risking burns.
Finally, all foreign bodies, glass, metal, debris, must be removed before closing anything, using tweezers or clean fingers. A wound that cannot be completely cleaned should remain open to heal from the inside; it will form a red, moist granulation tissue, a normal sign of good healing.
Preventing infectious risk and tetanus in isolated environments.
The great danger of an open wound in an isolated environment is the tetanus bacillus, responsible for the infamous locked jaw. This is precisely why up-to-date tetanus vaccination is essential before venturing far from everything; it costs nothing and prevents a deadly risk that is impossible to treat without medication on-site.
Once the wound is dressed, monitor it: change the dressing as soon as it becomes wet, emits a suspicious odor, or if the pain increases and starts to throb; these are signs of an infection setting in. An abscess may need to be opened to drain the pus, with a piece of sterile cloth left in place for a few days and then gradually removed as healing progresses.
To limit the risk of infection on a daily basis in an isolated environment, a few simple reflexes can make all the difference:
- Always boil drinking water
- Wash hands before preparing or eating
- Wash and peel fruits
- Sterilize kitchen utensils
- Cover up to limit insect bites
- Bury feces far from the campsite
These actions may seem basic, but they are what prevent the majority of infections in survival situations, well before any curative treatment.
Treating a nosebleed in the field
A nosebleed can be treated with a few simple but precise steps. The victim should be seated with their head slightly tilted forward, definitely not backward as is commonly believed, and the soft part of the nostrils should be pinched firmly for a good five minutes without releasing.
In the meantime, we encourage the person to breathe through their mouth and ask them not to sniff, as this would restart the bleeding. We also loosen any tight clothing around the neck, which helps improve circulation and generally calms the situation.
Reduce and immobilize a closed fracture without a doctor.
A fracture is recognized by several signs: sharp pain worsened by the slightest movement, sensitivity even to light pressure, swelling followed by the appearance of a bruise, visible deformity (shortening, abnormal angle), and sometimes a grinding noise that should never be intentionally provoked.
If a doctor can intervene within a reasonable time, it is better to immobilize without touching anything and wait. But if no help is possible, the fracture must be reduced as soon as possible, before muscle spasms make the procedure painful and difficult.
The technique involves applying slow and powerful traction, never a jolt, until the ends of the bone are realigned, regularly comparing with the uninjured limb. Once alignment is restored, immediate immobilization is done while maintaining traction to prevent the bone from slipping back, followed by the application of a splint.
Make a makeshift splint with available materials.
Almost any rigid material can serve as a splint: ski poles, branches, pieces of wreckage, driftwood, or even a tightly rolled newspaper. The key is to immobilize the entire length of the limb, not just the fractured area, by always placing padding, foam works very well, between the splint and the skin to avoid painful pressure points.
It should be secured firmly above and below the fracture, as well as at the nearest joints, with any available soft ties. All knots should be placed on the same side for easy access, and circulation at the extremities should be checked regularly; blue fingers or toes indicate excessive tightness.
In the absence of any splinting material, a limb can also be immobilized by simply binding it against the healthy limb or against the body, with padding placed in the natural hollows to maintain position. For a suspected neck fracture, an improvised cervical collar can be made from rolled newspaper or a towel folded to about ten centimeters wide, narrower at the back than at the front, wrapped around the neck and secured with a belt.
Traumatic amputation as a last vital resort
There is an extreme situation where amputation becomes the only option to save a life: a person trapped by a limb in a burning wreck, for example, where every minute brings them closer to death if nothing is done. It is a last resort gesture, never a decision taken lightly.
First, a tourniquet is applied above the affected area, ready to tie off the arteries as they appear. The skin and tissues are incised, allowing the skin to retract naturally, then the muscles that also retract are severed, exposing the bone or joint. The bone is sawed through, a flexible survival kit saw will do, or it is cut at a joint if no saw is available. The arteries are tied off, the stump is left open to drain, and then covered with a light dressing.
It should be noted that in the case of accidental amputation caused by a violent impact that tears off a limb, bleeding is surprisingly limited: the damaged muscle in the artery wall spasms and closes the vessel on its own. This allows time to examine the wound and tie off each visible artery before the situation worsens.
Preventing and treating minor ailments to avoid worsening.
In a survival situation, no minor injury should be overlooked, as a small problem left unattended can quickly worsen and weaken the entire body in the face of other challenges. A blister is treated by washing the area, sterilizing a needle, piercing the edge of the blister to drain the fluid without tearing the skin, and then covering it with a clean cloth.
A foreign body in the eye is removed by first inspecting the lower eyelid pulled down, then gently removing the object with a corner of a damp cloth. If it is hidden under the upper eyelid, it can be flipped over a small twig placed on top to reach it.
An earache, often caused by a wax blockage, can be soothed with a few drops of warmed edible oil poured into the canal, followed by a cotton ball for protection. For a toothache, the cavity exposing the nerve can be filled with freshly harvested pine resin applied on a piece of cotton.
These are details, but it is precisely these details that, when accumulated, sometimes determine the outcome of a prolonged isolation situation. It is better to address a small problem immediately than to let it grow without taking action.